🚚 Ready to order today? Use code SHIPTODAY50 for $50 off any order — no signup needed. Shop Now

Blog

  • Shipping Container Electrical Wiring Basics for Conversions

    Shipping Container Electrical Wiring Basics for Conversions

    Wiring a shipping container is closer to wiring a steel-framed building than a wood-framed one, and that distinction matters for both safety and code compliance. Here’s how power is typically run in a container office, cabin, or workshop build.
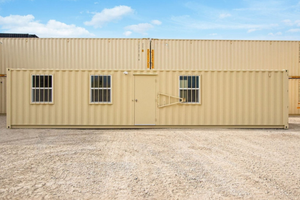
    Mobile office shipping container with electrical and plumbing fixtures
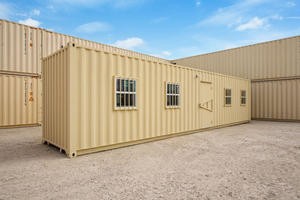
    A pre-wired mobile office container comes with a service panel, outlets, and lighting already installed.

    Start with a stud wall, not the steel

    Because the container’s walls are corrugated steel, conduit and boxes can’t be recessed into them the way they can into drywall. Most conversions build a thin stud wall (often 2×3 or metal studs) just inside the container skin, on top of the insulation layer. That stud wall carries the conduit, outlet boxes, and switch boxes, and also gives you a flat surface for interior wall finish.

    Bringing power in

    Most conversions bring in a standard 100 or 200-amp service, landing on a breaker panel mounted inside on the stud wall. For a job site or temporary setup, a generator or a temporary power pole feeding an exterior weatherproof panel is common instead. Either way, the entry point and panel location should be planned before insulation and interior walls go in, since retrofitting a panel afterward means cutting back into finished walls.

    Grounding to a steel structure

    A shipping container’s steel frame is electrically continuous, which is actually an advantage for grounding — the whole structure can serve as an equipotential bonding surface once it’s properly grounded to earth with a grounding rod and bonding conductor. A licensed electrician should handle this bonding; it’s not a step to skip or improvise, since an improperly grounded steel structure carrying a fault current is a genuine shock hazard.

    Lighting, outlets, and HVAC circuits

    Standard residential wiring practices apply once you’re past the entry and grounding: dedicated circuits for HVAC and any high-draw equipment, GFCI protection in wet areas like a container bathroom, and enough general-purpose circuits for lighting and outlets based on the container’s square footage. A 20ft container office typically needs 2–4 circuits; a full container home needs a proper load calculation like any residence.

    Permits and inspection

    Electrical work on a container conversion almost always requires a permit and inspection, the same as any building. Skipping this isn’t just a compliance risk — it can also void insurance coverage on the structure. See our zoning & permits guide for how to navigate this with your local building department.

    Related reading

    Wiring goes hand in hand with insulation — plan both together so conduit runs don’t conflict with foam thickness. See our home building guide for the bigger picture, or browse pre-wired office containers if you’d rather start from a unit that already has power roughed in.

    Wiring a specific build? See our guides to container offices for sale and container workshops & garages for how power needs differ by use case.

    Powering climate control equipment? See our climate control guide for mini-split circuit sizing.
  • Container Grades Explained: One-Trip vs Cargo-Worthy vs Wind-and-Watertight

    Container Grades Explained: One-Trip vs Cargo-Worthy vs Wind-and-Watertight

    “Condition grade” is the single most important spec on a container listing after size, and it’s also the most misunderstood. Grades aren’t marketing labels — they come from real inspection standards used across the shipping industry. Here’s what each one actually means.

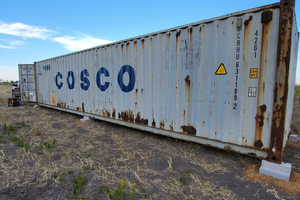
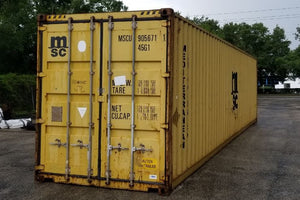
    Wind and water tight shipping container
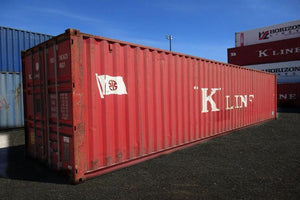
    A wind-and-watertight container has no active leaks or structural damage, but shows visible wear from service.

    One-Trip

    One-trip containers have made exactly one loaded ocean voyage — from the factory (almost always in Asia) to their first port of call — before being sold. They’re the closest thing to new you can buy: minimal rust, straight panels, and only the cosmetic wear of a single trip. They cost more than used grades but far less than a brand-new, never-shipped unit, which makes them the most popular choice for buyers who want a clean container for a home, office, or business front.

    Cargo-Worthy (CW)

    Cargo-worthy containers have been inspected and certified fit to carry ocean freight again. They’ve typically made several trips, show real wear — surface rust, dents, faded paint — but have no structural damage, and their doors, seals, and floor all function properly. CW is a solid, cost-effective grade for storage, job-site use, or as a base for modification, since any cosmetic issues get covered up during a build-out anyway.

    Wind-and-Watertight (WWT)

    WWT containers are no longer certified for ocean freight, usually due to accumulated cosmetic damage or a few small issues, but they’re guaranteed to keep wind and rain out — no active leaks, no holes, and doors that seal properly. This is the budget-friendly grade for straightforward dry storage where structural certification for reshipping doesn’t matter, but a rust-free, leak-free box does.

    “As-Is” and economy grades

    Below WWT, some containers are sold “as-is” or as economy-grade units — functional but with cosmetic issues, and sometimes small deficiencies like a dented panel or a door that needs adjustment. These are the least expensive option and can work well for very tolerant storage uses, but they’re not a good starting point for a livable conversion.

    Which grade should you buy?

    For a home, office, or anything the public will see, one-trip is worth the premium. For general storage or job-site use, cargo-worthy or WWT typically offers the best value. Our new vs. used containers guide goes deeper on this decision, and our pricing guide shows how grade affects cost by size.

    Inspect before you buy

    Whatever grade you’re quoted, ask for current photos of the doors, floor, and roof, and confirm the grade in writing on your order. See our lifespan & maintenance guide for what to check and how long each grade should hold up. Ready to compare grades on real units? Browse our current inventory.

    Ready to buy at the right grade? See containers for storage and refrigerated containers for sale to shop by grade and size.

  • Shipping Container Security Guide: Locks, Lock Boxes & Anti-Theft Tips

    Shipping Container Security Guide: Locks, Lock Boxes & Anti-Theft Tips

    One reason shipping containers are so popular for job-site and business storage is that a steel box is already a lot harder to break into than a wood shed — but the factory door handles and standard padlocks that come stock on most containers are the weakest point in that security. Here’s how to actually lock one down.

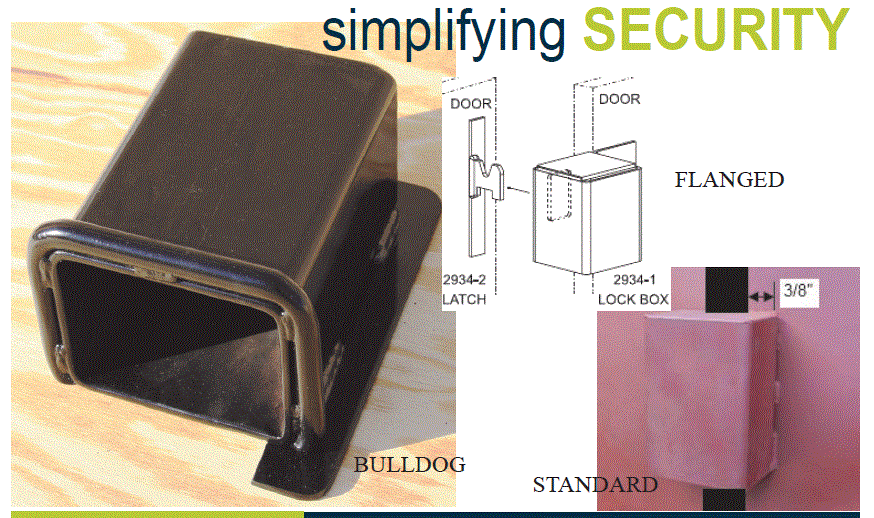
    Shipping container lock box installed over door handles
    A welded lock box covers the padlock entirely, leaving nothing for bolt cutters to grip.

    Why a standard padlock isn’t enough

    The factory locking bars on a container door are secure, but a padlock hanging on the outside of them is exposed to bolt cutters, cutting torches, and prying. A determined thief with the right tools can defeat an exposed padlock in under a minute. That’s the gap a lock box is built to close.

    Lock boxes: the standard upgrade

    A container lock box is a welded steel housing that covers the padlock and the locking rod handle entirely, leaving only a small keyhole exposed. Because there’s no shackle or body to get bolt cutters or a pry bar around, it removes the most common attack methods outright. It’s a one-time weld-on installation and, for most job sites and storage users, the single highest-value security upgrade available.

    Choosing the right padlock

    Once a lock box is installed, use a closed-shackle or disc-style padlock rated for outdoor use — the enclosed design resists cutting and picking better than a standard laminated padlock, and a weather-sealed body avoids the rust and seizing that makes locks unreliable after a season outdoors.

    Site setup matters as much as hardware

    Positioning the container with its doors facing away from the street or a fence line, parking equipment in front of the doors overnight, and keeping the area lit all reduce opportunity without spending anything on hardware. For higher-value contents, some job sites add a simple motion-activated light or camera aimed at the container doors.

    Related reading

    See our insurance guide for coverage on stored contents, and our guide to containers for construction sites for a full job-site security setup. Browse lock boxes and other accessories to harden any container you already own.

    Securing a job site? See our full guide to shipping containers for construction sites and portable storage for business.

    Adding power-free monitoring? See our solar security camera & motion light kit.

  • Shipping Container Ventilation & Condensation Control Guide

    Shipping Container Ventilation & Condensation Control Guide

    Ask anyone who has opened a sealed shipping container on a humid morning about “container rain” and they’ll know exactly what you mean: water dripping from the ceiling as if it rained inside, even though the container never leaked. It’s condensation, and it’s one of the most common (and most avoidable) problems in container storage and conversions.

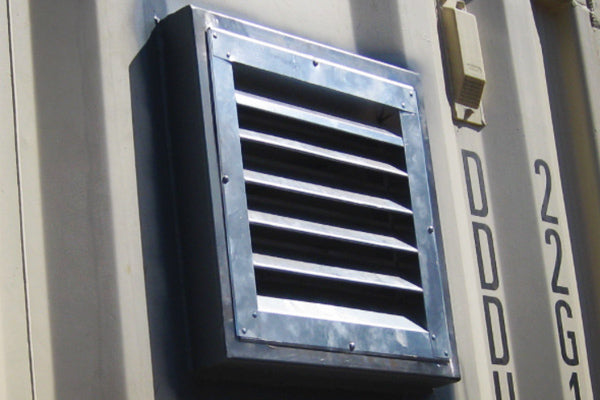
    Shipping container vent installed for airflow
    Passive vents installed high and low on a container let humid air escape before it condenses.

    Why condensation happens in a closed container

    Steel has almost no insulating value on its own, so the roof and walls of an uninsulated container quickly match the outside temperature. When warmer, moisture-laden air inside the box touches that cold steel, the air can’t hold as much water vapor and it condenses right on the ceiling and upper walls. Overnight temperature swings make this worse: warm daytime air gets trapped, then the steel cools rapidly after sunset and condensation forms while the container is sealed up.

    Passive ventilation: the simplest fix

    Louvered vents installed near the roofline (and sometimes paired with lower vents) let humid air escape and outside air circulate before moisture has a chance to condense. This is the standard, low-cost fix for storage containers holding goods that can tolerate some humidity swing, and it requires no power source.

    When ventilation isn’t enough

    For a conversion that will be occupied — an office, cabin, or workshop — passive vents alone usually aren’t enough, especially in humid climates. That’s where insulation (see our insulation guide) does the real work: by keeping the interior wall surface above the dew point, insulation stops condensation from forming in the first place rather than just venting it out after the fact. Active ventilation — a small exhaust fan tied to a humidity sensor — is worth adding to any insulated, occupied build.

    Protecting what’s stored inside

    If you’re using a container for long-term storage of anything moisture-sensitive — paper records, electronics, wood furniture, or dry goods — combine vents with moisture-absorbing desiccant packs or a small dehumidifier, and avoid stacking items directly against the walls or ceiling where condensation collects first. Pallets under stored goods also help keep anything off a concrete floor that can sweat in humid weather.

    Related reading

    See our lifespan & maintenance guide for how unmanaged moisture accelerates rust, and our modifications guide for adding vents, windows, or exhaust fans to an existing container. Browse vent kits or get in touch for help specifying a build for your climate.

    Building something that needs airflow? See our guides to container workshops and farm & agricultural storage, both of which depend on good ventilation.

  • Shipping Container Home Building Guide: Codes, Permits & Design Basics

    Shipping Container Home Building Guide: Codes, Permits & Design Basics

    Container homes have gone from a novelty to a genuinely popular way to build affordably, quickly, and with a smaller environmental footprint than traditional stick framing. But a livable container home is a real construction project, not just a box with furniture in it. Here’s what actually goes into building one, starting with a retreat cabin container or similar base unit.

    Shipping container retreat cabin used as a home
    A single 53ft retreat cabin container can serve as a complete small home or guest cabin.

    Start with your local building department, not the container

    The single biggest mistake first-time container home builders make is buying containers before confirming what their local building and zoning departments will actually permit. Most jurisdictions treat a container home exactly like a conventional structure for code purposes — it still needs a foundation, electrical, plumbing, egress windows, and insulation that meets local energy code. Some counties have never permitted one and require a variance; others have clear container-specific guidelines. Call before you buy. Our zoning and permits guide covers the questions to ask.

    One container, or a multi-container build?

    A single 40ft or 53ft high cube container gives you roughly 300–390 square feet — enough for a studio, guest house, or tiny home. For a full-size residence, most builders combine multiple containers side by side or stacked, cutting openings between units to create larger open rooms. Multi-container builds require structural engineering for the cut openings, since removing steel from a container’s walls or roof reduces its rigidity and needs to be compensated with reinforcement.

    Insulation and moisture control are non-negotiable

    Every livable container home needs insulation rated for its climate and a vapor barrier strategy that prevents condensation between the steel and the interior finish. See our insulation options guide for a breakdown of spray foam versus panel systems, and our ventilation guide for keeping air moving so moisture doesn’t get trapped against the walls.

    Utilities: electrical, plumbing, and HVAC

    Container walls are corrugated steel, which means conduit and plumbing typically run through a stud wall built just inside the container skin, not through the steel itself. This also gives you a cavity for additional insulation. See our electrical wiring basics guide for how power is typically run in a conversion.

    New, used, or one-trip for a home build?

    Because a home build lives with you for years and gets cut into structurally, most builders start with a cargo-worthy or one-trip grade container rather than a heavily weathered used unit. Our new vs. used comparison breaks down which grade makes sense for a residential build versus a job-site box that just needs to hold tools.

    Get started

    Once you’ve confirmed permitting locally, browse our container cabins & tiny homes to see base units, or reach out about financing a build.

    Ready to see finished models? Browse our container homes & cabins for sale to compare retreat cabins, bunkhouses, and modern cabin layouts.

  • Shipping Container Foundation & Site Preparation Guide

    Shipping Container Foundation & Site Preparation Guide

    A shipping container doesn’t need a foundation the way a house does — it’s a rigid steel box designed to carry its own weight at the corner castings — but the ground underneath it absolutely matters. The wrong site prep leads to a container that sinks unevenly, doors that jam, and water pooling against the walls. Here’s what to prepare before delivery, whichever container size you’re placing.

    40ft shipping container placed on a prepared site
    A level, well-drained site keeps a container’s doors, floor, and corner castings square for years.

    Why the ground matters more than a slab

    Containers are engineered to be lifted and stacked using the four corner castings, so nearly all of a container’s weight rests on those eight points (four bottom castings, plus the length of the bottom rail if it’s fully supported). If the ground under any one corner settles, the whole frame can rack slightly out of square, and that’s when doors stop lining up. Good site prep is really about giving those support points — and the rail between them — a stable, level, well-drained surface.

    Option 1: Compacted gravel pad

    The most common and cost-effective foundation is a compacted gravel pad, typically 4–6 inches of crushed stone graded flat and sloped slightly away from the container for drainage. It drains well, resists frost heave better than bare soil, and is inexpensive to install with a rented plate compactor. This is the standard choice for storage, job-site, and rental placements where the container may move again later.

    Option 2: Concrete piers or blocks

    For a more permanent placement, concrete piers poured at each corner (and at the midpoints of longer containers) lift the container off grade-level moisture and provide a precise, unmovable level surface. This is a common choice for container homes, offices, and cabins that will stay in place for years, since piers also make it easier to run utilities underneath the unit.

    Option 3: Full concrete slab

    A full slab is the most expensive option but makes sense for permanent installations, multi-container builds, or anywhere the container will be tied down structurally (high-wind zones, for example). A slab also gives you a finished, level surface right up to the container’s footprint, which is useful for buildings that will be walked in and out of frequently.

    What to check before delivery day

    Whichever foundation you choose, confirm ground clearance and access for delivery equipment beforehand. Delivery trucks generally need overhead clearance and enough straight-line room to slide the container off the trailer bed. See our delivery process guide for exact clearance requirements, and check local zoning and permit rules before you pour anything permanent.

    Related reading

    Once the site is ready, decide how the container itself needs to be finished — see our insulation guide and modifications guide. For sizing help, check container dimensions, and reach out for a delivery quote once your site is graded and ready.

    Planning a placement? See our guides to containers for storage, construction site containers, and portable storage for business for use-case-specific site tips.

  • Shipping Container Insulation Options: Complete Guide

    Shipping Container Insulation Options: Complete Guide

    A bare steel shipping container is a great structure and a terrible thermal envelope. Without insulation, an uninsulated box can swing from freezing overnight lows to well over 120°F inside on a sunny afternoon, and condensation (“container rain”) will form on the ceiling as warm, moist air meets cold steel. If you’re converting a container into an office, cabin, or workshop, insulation is the single upgrade that makes the space usable year-round.

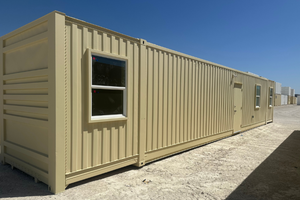
    Insulated shipping container office with siding
    An insulated, sided container office keeps interior temperatures stable in any climate.

    Why steel containers need insulation

    Steel is highly conductive, so a container’s walls transfer outside temperature straight to the interior almost instantly. Insulation slows that transfer and, just as importantly, keeps the interior air warmer than the steel skin’s dew point so moisture doesn’t condense on the ceiling and drip onto whatever is stored below. Any conversion meant for people, electronics, or moisture-sensitive inventory should be insulated before anything else is built out.

    Spray foam insulation

    Closed-cell spray polyurethane foam is the most common choice for container conversions. It’s sprayed directly onto the interior steel, expanding to fill every rib and seam with no gaps for moisture to sneak through. At 2–3 inches thick it delivers roughly R-13 to R-20, and because it bonds to the steel it also adds a layer of corrosion resistance on the inside face. It’s a good fit for offices, cabins, and workshops where interior wall thickness loss (a few inches per side) isn’t a concern.

    Rigid foam panel insulation

    Rigid polyisocyanurate or XPS panels are cut to fit between furring strips and fastened to the container walls. Panels are less expensive per square foot than spray foam and easier to source locally, but seams need to be taped or foamed to stop air leaks, and they don’t provide the same moisture-sealing performance as a monolithic spray-foam layer. Panels work well for budget builds and DIY projects where a contractor isn’t spraying foam on-site.

    Insulated siding and pre-built options

    For a turnkey approach, many buyers choose containers that already come insulated and sided from the factory, like our insulated office with siding. These units pair interior spray foam with an exterior siding layer that also protects the paint and adds a residential look, which is useful if the container will sit somewhere visible rather than at the back of a job site.

    Which R-value do you actually need?

    For an occasionally-used workshop or storage-adjacent office, R-13 spray foam is usually enough. For a container that will be lived in or run HVAC year-round, aim for R-19 or higher, which typically means thicker spray foam plus a service cavity, or foam panels combined with a mineral wool layer. Climate matters too — a container home in a northern climate needs meaningfully more insulation than the same build in the Gulf Coast.

    Related reading

    Insulation is one piece of a larger conversion. See our modifications guide for what else can be cut, added, or reinforced, our electrical wiring basics guide for powering an insulated build, and new vs. used containers if you’re still deciding on a base unit. Ready to spec out a build? Financing options are available, and our team can help you pick the right container for insulation from day one.

    Shopping for an insulated build? See our container offices for sale and homes & cabins for sale — both come with insulation already factored into the build.

    Choosing HVAC equipment? See our heating & cooling options guide.

  • Importing a Shipping Container: Customs & Regulations by Country

    Importing a Shipping Container: Customs & Regulations by Country

    Buying a shipping container from a U.S. exporter and having it delivered internationally means the container clears customs in your country before it reaches you. The paperwork is more predictable than it sounds — here’s the general process, and where to find country-specific notes.

    The Documents Involved

    • Commercial invoice — states the container’s value, used for calculating any duty or import tax owed
    • Bill of lading — the ocean carrier’s shipping document, proof of what’s being transported and to where
    • Packing list — describes the container itself (size, condition grade, any accessories)
    • Import declaration — filed with your country’s customs authority, often through a licensed customs broker

    We prepare the export-side documentation (commercial invoice, bill of lading) for every international order — you or your customs broker handle the import declaration on the receiving end.

    Duties and Import Tax Vary by Country

    Whether a used shipping container owes import duty, and at what rate, depends entirely on your country’s customs classification and current trade rules — we don’t publish a general duty rate because it varies too much to be reliable. What’s consistent everywhere: your customs broker or authority will classify the container by its HS (Harmonized System) code and assess any duty or import VAT/GST based on the commercial invoice value we provide.

    Working With a Customs Broker

    For anything beyond a small parcel, most buyers use a licensed customs broker to file the import declaration rather than doing it themselves — this is standard practice, not a sign of a complicated shipment. Freight forwarders and customs brokers at your destination port can usually quote their clearance fee before the container arrives, so it’s worth confirming that separately from our export quote.

    Country-Specific Notes

    We’ve published country-specific guides with import notes for several of our common export destinations, including Ireland, Singapore, New Zealand, the UAE, South Africa, and EU/EEA markets including Portugal, Poland, Sweden, Belgium, and Norway. If your destination isn’t listed, request a quote and we’ll walk you through what documentation your country typically requires.

    Request an Export Quote

    Tell us your delivery country and we’ll confirm container availability, export documentation, and estimated freight cost to your nearest port.

    Related Articles

    Shipping Container Zoning & Permit Basics

  • Are Shipping Containers a Good Investment? Resale Value Explained

    Are Shipping Containers a Good Investment? Resale Value Explained

    Shipping containers hold their value better than most equipment, but they’re not an appreciating asset the way real estate can be — think of buying one as locking in a usable structure at a fixed cost rather than a speculative investment. Here’s what actually drives resale value if you’re weighing the decision.

    What Holds Container Value Up

    • Steel scrap value acts as a floor — even a badly worn container is worth something for its raw steel, which limits how far resale value can fall
    • Condition grade at purchase — a Cargo-Worthy or New/One-Trip unit depreciates more slowly than an As-Is unit, since it started in better shape
    • Regional demand — resale value is stronger in areas with active construction, storage, or export demand for used containers
    • Unmodified units resell easier — heavy modification (cut walls, removed sections) narrows the pool of buyers to those wanting exactly that conversion

    What Actually Lowers Resale Value

    • Rust that’s progressed past the surface into structural steel
    • Non-standard modifications that limit reuse for shipping or standard storage
    • Long-term outdoor placement without maintenance — see our lifespan and maintenance guide for what extends usable life

    The Realistic Way to Think About It

    For most buyers, the real return isn’t resale appreciation — it’s avoiding rental or storage-unit costs over time by owning instead. If you’re specifically weighing rent vs. buy, our renting vs. buying guide walks through that comparison. If you do eventually resell, buying a well-graded, unmodified container and maintaining it is what protects resale value most — not the size or brand you choose.

    For current buy pricing by size and condition, see our pricing guide.

    Related Articles

    How Long Do Shipping Containers Last?
    Renting vs. Buying a Shipping Container
    Shipping Container Modifications: What’s Possible

  • Shipping Container Weight Limits & Load Capacity

    Shipping Container Weight Limits & Load Capacity

    Every shipping container has a maximum gross weight rating set by international shipping standards — the combined weight of the container itself (tare weight) plus whatever it’s carrying (payload). Here’s what those standard ratings actually are, and what they mean if you’re loading, moving, or placing a container.

    Standard Weight Ratings by Size

    These are the typical ISO-standard ratings manufacturers certify containers to — always check the CSC (Convention for Safe Containers) plate on the actual unit’s door for its exact certified rating, since it can vary slightly by manufacturer and container age:

    • 20ft standard — tare weight around 4,900–5,100 lbs (2,200–2,300 kg); max gross weight around 52,900 lbs (24,000 kg); max payload roughly 47,900 lbs (21,700 kg)
    • 40ft standard — tare weight around 8,400–8,600 lbs (3,800–3,900 kg); max gross weight around 67,200 lbs (30,480 kg); max payload roughly 58,600 lbs (26,600 kg)
    • 40ft High Cube — similar max gross weight to standard 40ft, with slightly higher tare weight due to the extra height, so slightly less rated payload

    What This Means Outside of Shipping

    If you’re using a container for storage, a conversion, or as a foundation for a build, the max gross rating matters less than how the load is distributed. Containers are engineered to carry their rated weight through the corner castings and bottom rails — not through the floor or roof directly. A few things to keep in mind:

    • Point loads (a vehicle lift, heavy machinery, water tank) need to be positioned over the floor’s structural cross-members, not just anywhere on the plywood floor
    • Stacking containers relies on the corner castings lining up — off-center stacking isn’t rated the same as standard stacking
    • Roofs are rated for snow/rain load, not for foot traffic or equipment unless specifically reinforced

    Delivery Weight Considerations

    An empty container’s tare weight is also what determines what equipment can lift and deliver it. Our delivery process accounts for this automatically — see our delivery day guide for how placement works on your site.

    Related Articles

    Shipping Container Sizes: Complete Dimensions Guide
    Shipping Container Modifications: What’s Possible
    How Long Do Shipping Containers Last? Lifespan & Maintenance Tips