🚚 Ready to order today? Use code SHIPTODAY50 for $50 off any order — no signup needed. Shop Now

Blog

  • Shipping Container Offices for Sale: Costs, Layouts & What’s Included

    Shipping Container Offices for Sale: Costs, Layouts & What’s Included

    A container office gets a business a real, lockable, climate-controllable workspace on a job site or lot in days rather than months — no framing crew, no foundation pour, just a delivery and a hookup. Here’s what’s typically included and how to choose the right one.
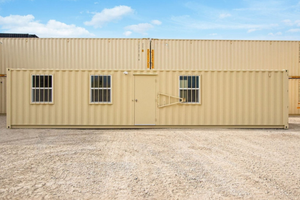
    Mobile shipping container office with bathroom
    A 40ft mobile office container with a built-in bathroom, ready for job-site delivery.

    What comes in a container office

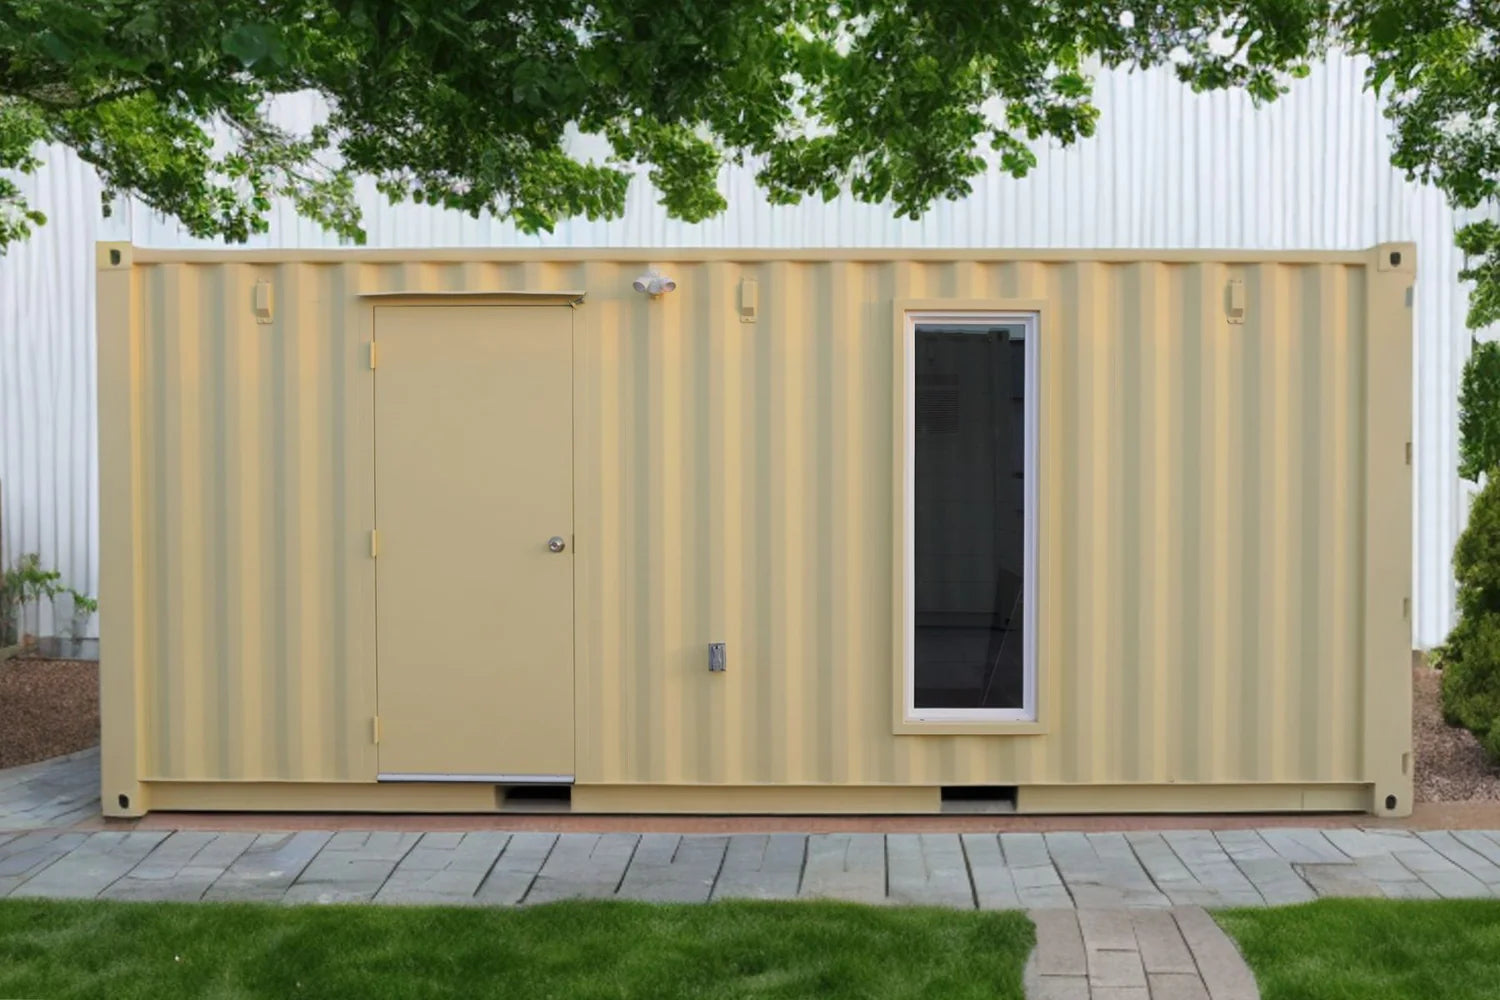
    Most office containers, like our 40ft mobile office with bathroom, arrive insulated, wired for lighting and outlets, and finished with interior wall paneling — essentially move-in ready aside from connecting power and, if included, plumbing. Simpler units skip the bathroom and interior finish for a lower price point, which works well if the office just needs a desk, a heater, and a lockable door.

    Choosing a size

    A 20ft office comfortably fits one or two desks and a small meeting area — enough for a site foreman or small crew. A 40ft office, especially a 40ft insulated office with siding, gives room for multiple workstations, a small conference area, and often a private office or bathroom.

    Insulation and comfort

    Because an office is occupied for full workdays, insulation isn’t optional the way it might be for a storage container. See our insulation options guide for what to look for, and our electrical wiring guide for how power and HVAC circuits are typically run.

    Permits for a job-site office

    Temporary job-site offices are usually easier to permit than a permanent structure, but rules vary by municipality — check our zoning & permits guide before delivery, especially if the office will stay in place longer than a single project.

    Get a container office delivered

    Browse our full container office lineup, check financing options, or get a delivered price through our quote request.
  • Shipping Containers for Storage: Which Size Is Right for You?

    Shipping Containers for Storage: Which Size Is Right for You?

    Storage is the single most common reason people buy a shipping container — no rent, no monthly fee, and a steel structure that will outlast almost anything you put inside it. The main decision is sizing it correctly for what you’re storing.

    40ft shipping container for storage
    A 40ft container holds the contents of a 3–4 bedroom home with room to spare.

    20ft containers: the household and small-business default

    A 20ft container offers about 160 square feet of floor space — roughly the contents of a 1–2 bedroom home, a landscaping crew’s equipment, or several pallets of business inventory. It’s also easier to place on tighter residential lots and generally costs less to deliver given its smaller footprint. See exact interior measurements on our dimensions page.

    40ft containers: for bigger households and businesses

    A 40ft container roughly doubles that to around 320 square feet, enough for a full household move, construction equipment, or a business that needs serious inventory capacity. A 40ft High Cube adds another foot of height, which matters if you’re storing anything tall or plan to stack pallets.

    New, used, or one-trip for storage?

    For pure storage — no conversion, no insulation, just a dry, secure box — a cargo-worthy or wind-and-watertight used container is usually the best value, since cosmetic wear doesn’t affect how well it protects what’s inside. See our grades explained guide for the difference, and our pricing guide for current cost by size and grade.

    Protecting what’s stored inside

    Add a lock box if the container will sit somewhere unsupervised, and consider vents if you’re storing anything moisture-sensitive — see our ventilation guide for why that matters even in a sealed box.

    Buy or rent?

    If you only need storage for a few months, renting may cost less overall than buying — see our renting vs. buying guide to compare. Ready to move forward? Browse containers by size or check delivery availability in your area.

    Need something smaller? See our 10ft container guide for tight-space options.

  • How Many Shipping Containers Can Be Stacked? Structural & Load Guide

    How Many Shipping Containers Can Be Stacked? Structural & Load Guide

    Shipping containers are engineered from the start to be stacked — it’s how they travel by the thousands on container ships, nine or more high, fully loaded. That stacking strength is one of their most useful properties for storage yards and multi-container builds, but it comes with real limits once a container has been altered.

    Shipping container corner casting used for stacking
    The four corner castings carry a container’s stacking load straight down through the frame.

    How stacking actually works

    A container’s strength comes almost entirely from its corner castings and corner posts, not its walls or roof. When containers are stacked, each corner casting sits directly on the one below it, transferring the load straight down through the steel frame rather than through the (much weaker) corrugated wall panels. This is why containers can be stacked so high on a ship: the load path never runs through anything but engineered structural steel.

    What’s actually safe on land

    On a ship, fully loaded containers are routinely stacked eight or nine high with the load spread and secured by the vessel’s cell guides. On land, without that same lateral bracing, most storage yards and structural guidance keep stacking to two or three high for unmodified, standard containers on a level, stable surface, and lower than that for anything less than cargo-worthy condition. Always stack corner-to-corner, never offset, and never stack on soft or uneven ground.

    Modified containers lose stacking strength

    This is the detail that catches a lot of builders off guard: cutting a door, window, or large opening into a container’s walls or roof reduces its structural rigidity, and that rigidity is part of what makes stacking safe. A heavily modified container — multiple cutouts, an open side, a removed end wall — should not be assumed to carry the same stacking load as an unmodified unit unless it’s been specifically reinforced and engineered for that use. This matters most for multi-container homes and offices, where stacked, modified units need real structural engineering, not just the container’s original factory rating.

    Foundations still matter when stacking

    Because the full weight of an upper container transfers straight down through the corners, the foundation under a stacked build needs to support concentrated point loads at each corner, not just an even distributed load. See our foundation & site prep guide for how this changes footing requirements on a multi-container project.

    Related reading

    If you’re planning a stacked, multi-container build, read our modifications guide and home building guide before finalizing a design, and work with a structural engineer for anything beyond two unmodified containers.

    Planning a multi-container build? See our guide to modified shipping containers for sale for how modifications affect what can safely be stacked.

  • Shipping Container Flooring Guide: Materials, Treatment & Replacement

    Shipping Container Flooring Guide: Materials, Treatment & Replacement

    Most shipping container floors are marine plywood bonded to the steel cross-members, engineered to carry rolling forklift loads at sea and on the docks. It’s an extremely durable floor system, but it’s also one of the few parts of a container that can need attention over time — especially on older or heavily used units.

    Interior floor of a shipping container storage unit
    A container’s marine plywood floor is built to carry rolling loads directly on the steel cross-members.

    What the factory floor is made of

    Standard container flooring is 28mm (about 1⅓-inch) marine-grade plywood, historically treated with a preservative to resist rot, insects, and moisture during years of ocean shipping. It’s screwed or bonded to steel cross-members spaced roughly every 10–12 inches, which is what gives the floor its forklift-rated strength.

    Older treatment chemicals: what to know

    Containers manufactured years ago sometimes used older-generation wood preservatives that are no longer considered ideal for enclosed, occupied spaces. If you’re converting an older used container into a home, office, or anything with extended human occupancy, it’s worth confirming the floor’s treatment history or planning to seal, cover, or replace the floor as part of the build. Newer containers use preservatives that are generally considered safer for enclosed use, but checking is still good practice.

    When to replace vs. cover

    A floor with surface wear, minor staining, or light denting from years of cargo doesn’t need replacement — it can be cleaned, sanded, and sealed, or simply covered with your finish flooring of choice (vinyl plank, epoxy coating, or tile over a subfloor layer). Replace the floor outright if there’s rot, delamination, soft spots you can feel underfoot, or damage from a forklift tine puncture, since a compromised floor won’t safely support cross-member spans anymore.

    Finishing options for conversions

    For offices and cabins, a common approach is a thin subfloor layer over the existing plywood, then standard finish flooring — vinyl plank, laminate, or tile — the same as you’d choose for any small structure. For workshops or storage where durability matters more than looks, an epoxy coating applied directly over the sealed plywood holds up well to rolling equipment and spills.

    Related reading

    See our lifespan & maintenance guide for how flooring factors into a container’s overall condition grade, and our grades explained guide for what floor condition to expect at each grade. Browse storage unit containers with floors ready for immediate use.

    Setting up a storage container? See portable storage for business for flooring considerations on business inventory.

    Prepping before move-in? See our cleaning & interior prep guide.

  • Shipping Container Roofing Options: Flat vs Pitched Roof Conversions

    Shipping Container Roofing Options: Flat vs Pitched Roof Conversions

    A container’s factory roof is flat corrugated steel, crowned just slightly in the center to shed water toward the sides. That works fine on a ship or a job site, but for a conversion that will be lived in or seen by customers, roofing is one of the first design decisions that affects both function and curb appeal.

    Modern shipping container cabin exterior
    A modern cabin build keeping the factory flat roof, finished with clean siding and trim.

    Keeping the factory flat roof

    The simplest and least expensive option is to keep the original flat roof and add a membrane coating or additional insulation on top. This works well for offices, storage conversions, and budget cabin builds, and it keeps the container’s structural roof panel doing exactly the job it was engineered for. The tradeoff is a slightly warmer interior in direct sun unless roof insulation is upgraded, and ponding water can be an issue if the roof isn’t perfectly level.

    Adding a pitched roof

    A pitched roof is built as a separate structure over the container — typically a light steel or wood frame with standard roofing (metal panel or shingles) — rather than replacing the container’s own roof panel, which stays in place as the ceiling. This adds real headroom for a loft, sheds water and snow far more effectively than a flat surface, and gives a container home a look that reads as a house rather than a box. It’s the more expensive option, both in materials and in the structural work to support the added frame.

    Cool roofing and reflective coatings

    For hot climates, a reflective roof coating over the existing flat roof cuts solar heat gain significantly without the cost of a full pitched-roof build. This pairs well with the insulation upgrades covered in our insulation guide, and it’s a common addition to container offices and retail conversions that need to stay comfortable without oversized HVAC.

    Drainage still matters either way

    Whichever roof style you choose, confirm water sheds cleanly away from door seals and any roof penetrations (vents, skylights, HVAC curbs). Poor drainage around a modified roof is one of the more common sources of leaks in container conversions, precisely because the factory roof wasn’t designed with those cutouts in mind.

    Related reading

    See our modifications guide for what roof cuts and reinforcements involve structurally, and our home building guide for how roofing fits into a full build plan. Browse cabin & tiny home containers to see finished roofing styles on real units.

    Choosing a roof style for a real build? See our container homes & cabins for sale to compare finished roofing on real models.

  • Shipping Container Electrical Wiring Basics for Conversions

    Shipping Container Electrical Wiring Basics for Conversions

    Wiring a shipping container is closer to wiring a steel-framed building than a wood-framed one, and that distinction matters for both safety and code compliance. Here’s how power is typically run in a container office, cabin, or workshop build.

    Mobile office shipping container with electrical and plumbing fixtures
    A pre-wired mobile office container comes with a service panel, outlets, and lighting already installed.

    Start with a stud wall, not the steel

    Because the container’s walls are corrugated steel, conduit and boxes can’t be recessed into them the way they can into drywall. Most conversions build a thin stud wall (often 2×3 or metal studs) just inside the container skin, on top of the insulation layer. That stud wall carries the conduit, outlet boxes, and switch boxes, and also gives you a flat surface for interior wall finish.

    Bringing power in

    Most conversions bring in a standard 100 or 200-amp service, landing on a breaker panel mounted inside on the stud wall. For a job site or temporary setup, a generator or a temporary power pole feeding an exterior weatherproof panel is common instead. Either way, the entry point and panel location should be planned before insulation and interior walls go in, since retrofitting a panel afterward means cutting back into finished walls.

    Grounding to a steel structure

    A shipping container’s steel frame is electrically continuous, which is actually an advantage for grounding — the whole structure can serve as an equipotential bonding surface once it’s properly grounded to earth with a grounding rod and bonding conductor. A licensed electrician should handle this bonding; it’s not a step to skip or improvise, since an improperly grounded steel structure carrying a fault current is a genuine shock hazard.

    Lighting, outlets, and HVAC circuits

    Standard residential wiring practices apply once you’re past the entry and grounding: dedicated circuits for HVAC and any high-draw equipment, GFCI protection in wet areas like a container bathroom, and enough general-purpose circuits for lighting and outlets based on the container’s square footage. A 20ft container office typically needs 2–4 circuits; a full container home needs a proper load calculation like any residence.

    Permits and inspection

    Electrical work on a container conversion almost always requires a permit and inspection, the same as any building. Skipping this isn’t just a compliance risk — it can also void insurance coverage on the structure. See our zoning & permits guide for how to navigate this with your local building department.

    Related reading

    Wiring goes hand in hand with insulation — plan both together so conduit runs don’t conflict with foam thickness. See our home building guide for the bigger picture, or browse pre-wired office containers if you’d rather start from a unit that already has power roughed in.

    Wiring a specific build? See our guides to container offices for sale and container workshops & garages for how power needs differ by use case.

    Powering climate control equipment? See our climate control guide for mini-split circuit sizing.

  • Container Grades Explained: One-Trip vs Cargo-Worthy vs Wind-and-Watertight

    Container Grades Explained: One-Trip vs Cargo-Worthy vs Wind-and-Watertight

    “Condition grade” is the single most important spec on a container listing after size, and it’s also the most misunderstood. Grades aren’t marketing labels — they come from real inspection standards used across the shipping industry. Here’s what each one actually means.

    Wind and water tight shipping container
    A wind-and-watertight container has no active leaks or structural damage, but shows visible wear from service.

    One-Trip

    One-trip containers have made exactly one loaded ocean voyage — from the factory (almost always in Asia) to their first port of call — before being sold. They’re the closest thing to new you can buy: minimal rust, straight panels, and only the cosmetic wear of a single trip. They cost more than used grades but far less than a brand-new, never-shipped unit, which makes them the most popular choice for buyers who want a clean container for a home, office, or business front.

    Cargo-Worthy (CW)

    Cargo-worthy containers have been inspected and certified fit to carry ocean freight again. They’ve typically made several trips, show real wear — surface rust, dents, faded paint — but have no structural damage, and their doors, seals, and floor all function properly. CW is a solid, cost-effective grade for storage, job-site use, or as a base for modification, since any cosmetic issues get covered up during a build-out anyway.

    Wind-and-Watertight (WWT)

    WWT containers are no longer certified for ocean freight, usually due to accumulated cosmetic damage or a few small issues, but they’re guaranteed to keep wind and rain out — no active leaks, no holes, and doors that seal properly. This is the budget-friendly grade for straightforward dry storage where structural certification for reshipping doesn’t matter, but a rust-free, leak-free box does.

    “As-Is” and economy grades

    Below WWT, some containers are sold “as-is” or as economy-grade units — functional but with cosmetic issues, and sometimes small deficiencies like a dented panel or a door that needs adjustment. These are the least expensive option and can work well for very tolerant storage uses, but they’re not a good starting point for a livable conversion.

    Which grade should you buy?

    For a home, office, or anything the public will see, one-trip is worth the premium. For general storage or job-site use, cargo-worthy or WWT typically offers the best value. Our new vs. used containers guide goes deeper on this decision, and our pricing guide shows how grade affects cost by size.

    Inspect before you buy

    Whatever grade you’re quoted, ask for current photos of the doors, floor, and roof, and confirm the grade in writing on your order. See our lifespan & maintenance guide for what to check and how long each grade should hold up. Ready to compare grades on real units? Browse our current inventory.

    Ready to buy at the right grade? See containers for storage and refrigerated containers for sale to shop by grade and size.

  • Shipping Container Security Guide: Locks, Lock Boxes & Anti-Theft Tips

    Shipping Container Security Guide: Locks, Lock Boxes & Anti-Theft Tips

    One reason shipping containers are so popular for job-site and business storage is that a steel box is already a lot harder to break into than a wood shed — but the factory door handles and standard padlocks that come stock on most containers are the weakest point in that security. Here’s how to actually lock one down.

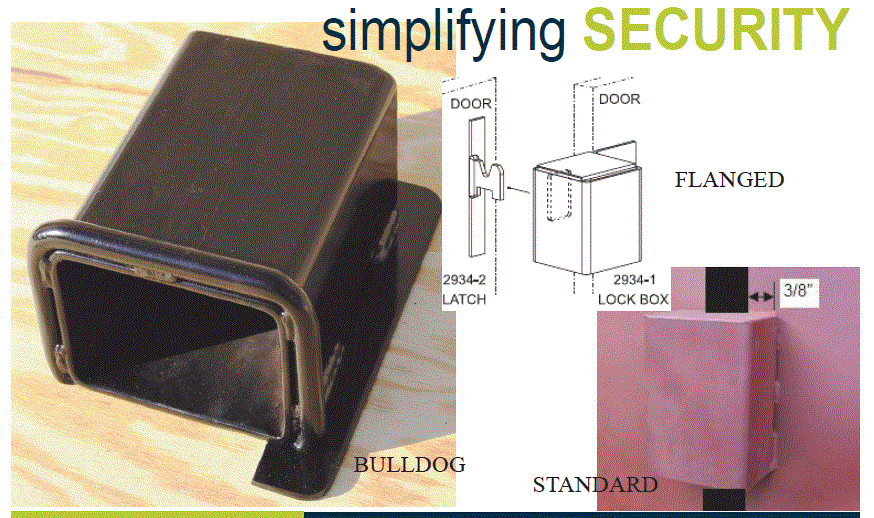
    Shipping container lock box installed over door handles
    A welded lock box covers the padlock entirely, leaving nothing for bolt cutters to grip.

    Why a standard padlock isn’t enough

    The factory locking bars on a container door are secure, but a padlock hanging on the outside of them is exposed to bolt cutters, cutting torches, and prying. A determined thief with the right tools can defeat an exposed padlock in under a minute. That’s the gap a lock box is built to close.

    Lock boxes: the standard upgrade

    A container lock box is a welded steel housing that covers the padlock and the locking rod handle entirely, leaving only a small keyhole exposed. Because there’s no shackle or body to get bolt cutters or a pry bar around, it removes the most common attack methods outright. It’s a one-time weld-on installation and, for most job sites and storage users, the single highest-value security upgrade available.

    Choosing the right padlock

    Once a lock box is installed, use a closed-shackle or disc-style padlock rated for outdoor use — the enclosed design resists cutting and picking better than a standard laminated padlock, and a weather-sealed body avoids the rust and seizing that makes locks unreliable after a season outdoors.

    Site setup matters as much as hardware

    Positioning the container with its doors facing away from the street or a fence line, parking equipment in front of the doors overnight, and keeping the area lit all reduce opportunity without spending anything on hardware. For higher-value contents, some job sites add a simple motion-activated light or camera aimed at the container doors.

    Related reading

    See our insurance guide for coverage on stored contents, and our guide to containers for construction sites for a full job-site security setup. Browse lock boxes and other accessories to harden any container you already own.

    Securing a job site? See our full guide to shipping containers for construction sites and portable storage for business.

    Adding power-free monitoring? See our solar security camera & motion light kit.

  • Shipping Container Ventilation & Condensation Control Guide

    Shipping Container Ventilation & Condensation Control Guide

    Ask anyone who has opened a sealed shipping container on a humid morning about “container rain” and they’ll know exactly what you mean: water dripping from the ceiling as if it rained inside, even though the container never leaked. It’s condensation, and it’s one of the most common (and most avoidable) problems in container storage and conversions.

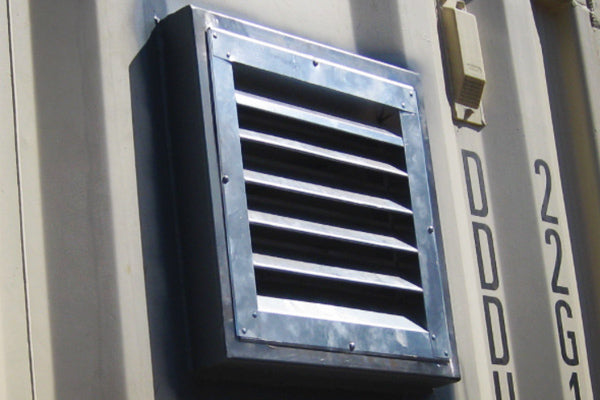
    Shipping container vent installed for airflow
    Passive vents installed high and low on a container let humid air escape before it condenses.

    Why condensation happens in a closed container

    Steel has almost no insulating value on its own, so the roof and walls of an uninsulated container quickly match the outside temperature. When warmer, moisture-laden air inside the box touches that cold steel, the air can’t hold as much water vapor and it condenses right on the ceiling and upper walls. Overnight temperature swings make this worse: warm daytime air gets trapped, then the steel cools rapidly after sunset and condensation forms while the container is sealed up.

    Passive ventilation: the simplest fix

    Louvered vents installed near the roofline (and sometimes paired with lower vents) let humid air escape and outside air circulate before moisture has a chance to condense. This is the standard, low-cost fix for storage containers holding goods that can tolerate some humidity swing, and it requires no power source.

    When ventilation isn’t enough

    For a conversion that will be occupied — an office, cabin, or workshop — passive vents alone usually aren’t enough, especially in humid climates. That’s where insulation (see our insulation guide) does the real work: by keeping the interior wall surface above the dew point, insulation stops condensation from forming in the first place rather than just venting it out after the fact. Active ventilation — a small exhaust fan tied to a humidity sensor — is worth adding to any insulated, occupied build.

    Protecting what’s stored inside

    If you’re using a container for long-term storage of anything moisture-sensitive — paper records, electronics, wood furniture, or dry goods — combine vents with moisture-absorbing desiccant packs or a small dehumidifier, and avoid stacking items directly against the walls or ceiling where condensation collects first. Pallets under stored goods also help keep anything off a concrete floor that can sweat in humid weather.

    Related reading

    See our lifespan & maintenance guide for how unmanaged moisture accelerates rust, and our modifications guide for adding vents, windows, or exhaust fans to an existing container. Browse vent kits or get in touch for help specifying a build for your climate.

    Building something that needs airflow? See our guides to container workshops and farm & agricultural storage, both of which depend on good ventilation.

  • Shipping Container Home Building Guide: Codes, Permits & Design Basics

    Shipping Container Home Building Guide: Codes, Permits & Design Basics

    Container homes have gone from a novelty to a genuinely popular way to build affordably, quickly, and with a smaller environmental footprint than traditional stick framing. But a livable container home is a real construction project, not just a box with furniture in it. Here’s what actually goes into building one, starting with a retreat cabin container or similar base unit.

    Shipping container retreat cabin used as a home
    A single 53ft retreat cabin container can serve as a complete small home or guest cabin.

    Start with your local building department, not the container

    The single biggest mistake first-time container home builders make is buying containers before confirming what their local building and zoning departments will actually permit. Most jurisdictions treat a container home exactly like a conventional structure for code purposes — it still needs a foundation, electrical, plumbing, egress windows, and insulation that meets local energy code. Some counties have never permitted one and require a variance; others have clear container-specific guidelines. Call before you buy. Our zoning and permits guide covers the questions to ask.

    One container, or a multi-container build?

    A single 40ft or 53ft high cube container gives you roughly 300–390 square feet — enough for a studio, guest house, or tiny home. For a full-size residence, most builders combine multiple containers side by side or stacked, cutting openings between units to create larger open rooms. Multi-container builds require structural engineering for the cut openings, since removing steel from a container’s walls or roof reduces its rigidity and needs to be compensated with reinforcement.

    Insulation and moisture control are non-negotiable

    Every livable container home needs insulation rated for its climate and a vapor barrier strategy that prevents condensation between the steel and the interior finish. See our insulation options guide for a breakdown of spray foam versus panel systems, and our ventilation guide for keeping air moving so moisture doesn’t get trapped against the walls.

    Utilities: electrical, plumbing, and HVAC

    Container walls are corrugated steel, which means conduit and plumbing typically run through a stud wall built just inside the container skin, not through the steel itself. This also gives you a cavity for additional insulation. See our electrical wiring basics guide for how power is typically run in a conversion.

    New, used, or one-trip for a home build?

    Because a home build lives with you for years and gets cut into structurally, most builders start with a cargo-worthy or one-trip grade container rather than a heavily weathered used unit. Our new vs. used comparison breaks down which grade makes sense for a residential build versus a job-site box that just needs to hold tools.

    Get started

    Once you’ve confirmed permitting locally, browse our container cabins & tiny homes to see base units, or reach out about financing a build.

    Ready to see finished models? Browse our container homes & cabins for sale to compare retreat cabins, bunkhouses, and modern cabin layouts.